
因为有些软件不支持主动设置代理,所以有时候还得开个透明代理,在实际买设备前先用虚拟机安装 OpenWrt 实验一把。
一开始想着去找那些有一键设置的工具或脚本,结果来回折腾花了不少时间,最后还是参考这里的教程搞定了。
准备镜像
- 下载目前最新的 OpenWrt 镜像
- 解压得到
*.img,记为op.img - (可选)用这个镜像安装后的默认可用空间只有 100M,比较捉鸡。为了方便后续安装各种软件先做个扩容:到 Linux 系统下或用 wsl,运行
dd if=/dev/zero bs=1M count=2048 >> op.img,将镜像扩容到 2G - (可选)执行
parted op.img,再输入print,可以看到镜像中有两个分区,第二个范围是 17.3M~126M,共 109M 大小。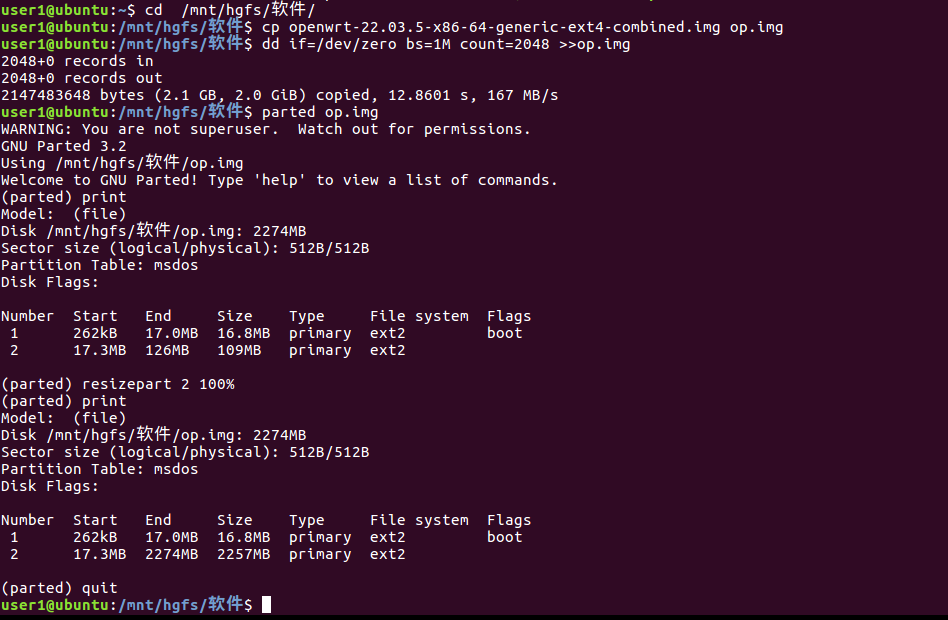
- (可选)执行
resizepart 2 100%让分区 2 占满剩余的全部空间,再print一次可以看到分区 2 的大小已经更新,执行quit退出。
转换格式为 vhd
为了给 hyper-v 用还需要转换镜像格式,下一个 StarWind V2V Converter 将扩容后的镜像转为 VHD 格式,要选 VHD pre-allocated image,这样转出来的 vhd 也是 2.1G 大小。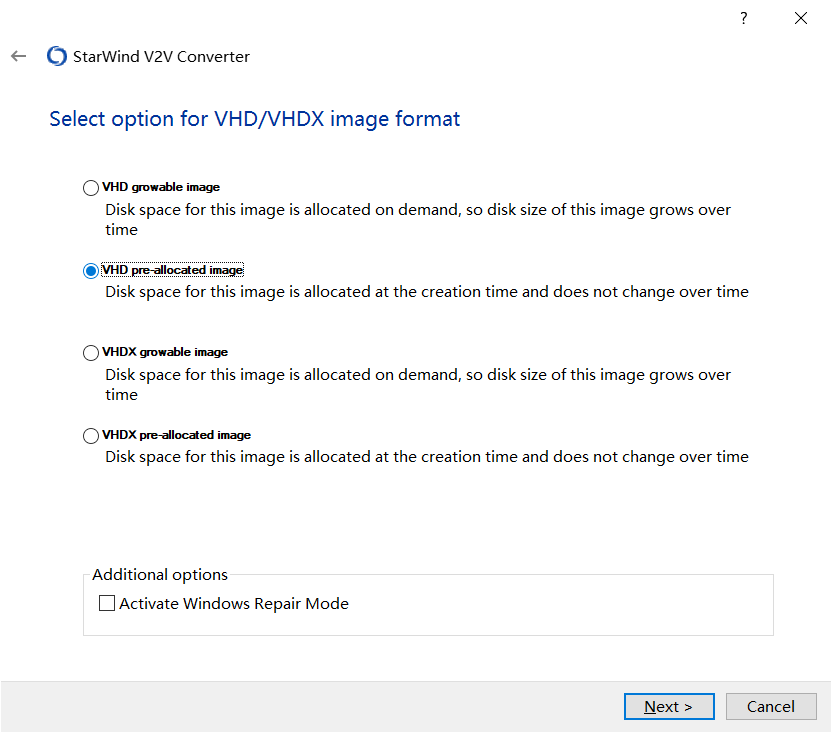
创建 hyper-v 虚拟交换机
- 安装完 hyper-v 后系统会自动创建
Default Switch,这里要额外创建两个交换机,分别用于外网和内网的连接,对应网关上的 wan 和 lan。
- 外网的 External 选中物理网卡,并去掉
允许管理操作系统共享此网络适配器勾选 - 内网的 Internal 直接选
内部网络就行
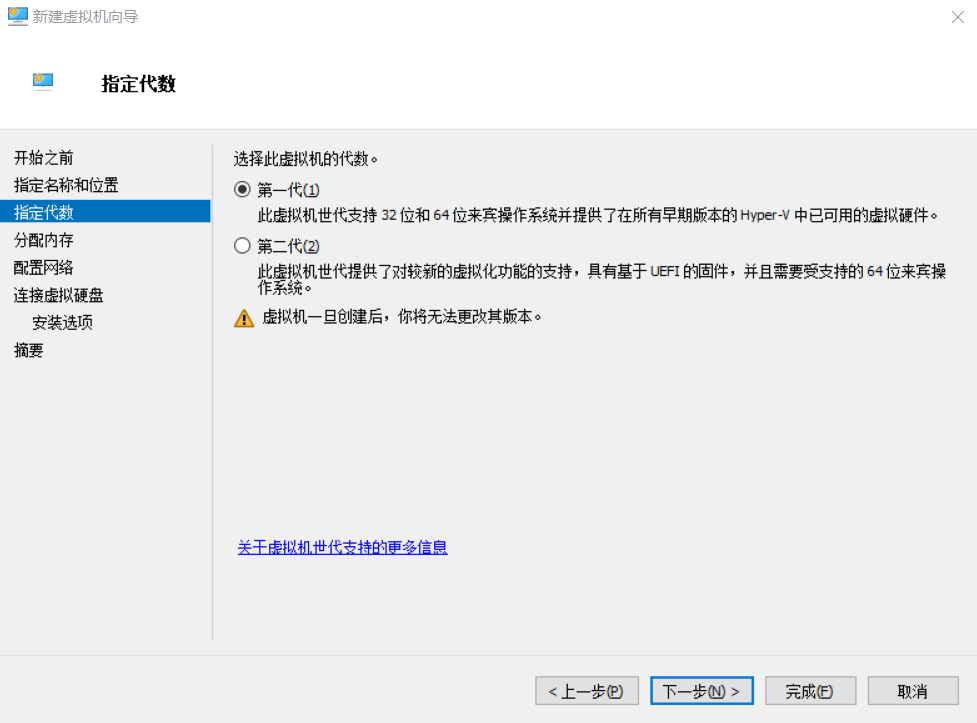
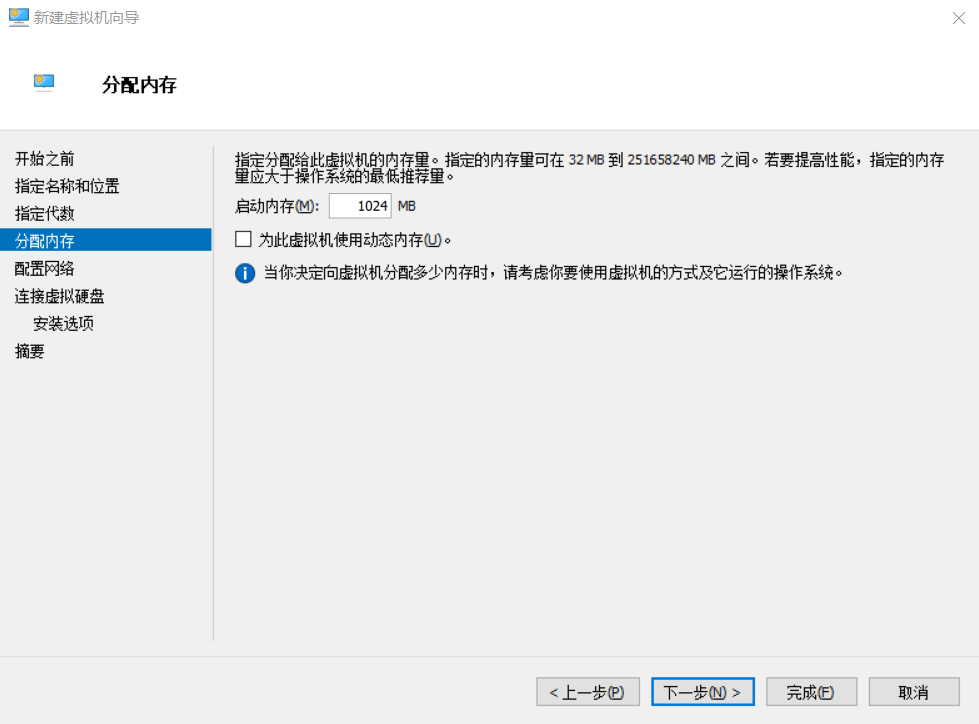
创建 hyper-v 虚拟机
- 选第一代
- 1G 内存,不用动态
- 选中 External 交换机
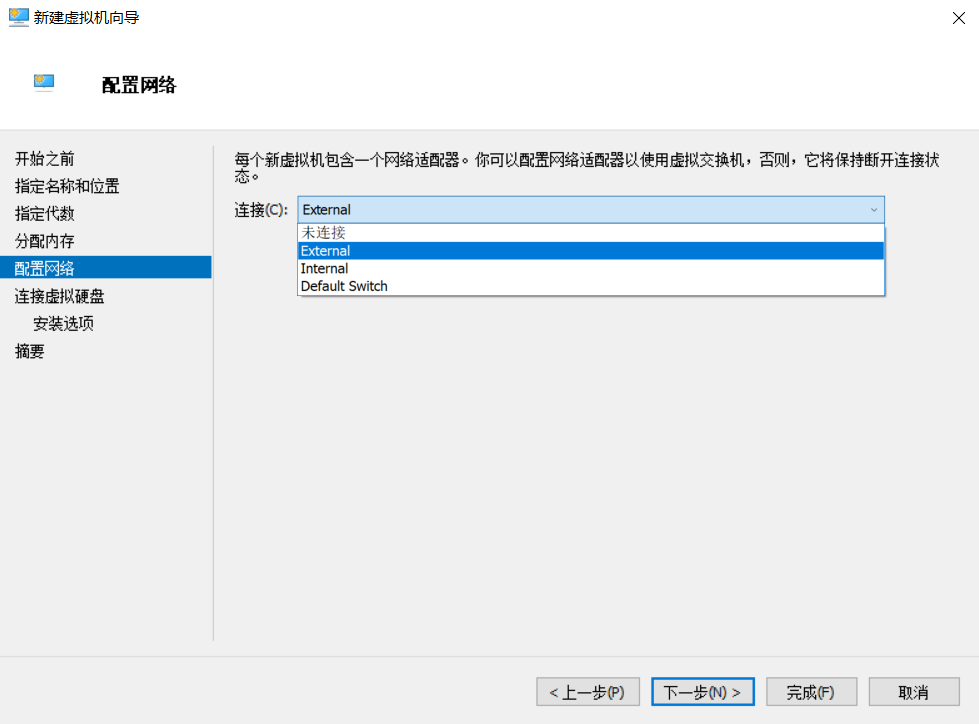
- 使用刚才创建好的 vhd 虚拟硬盘,下一步
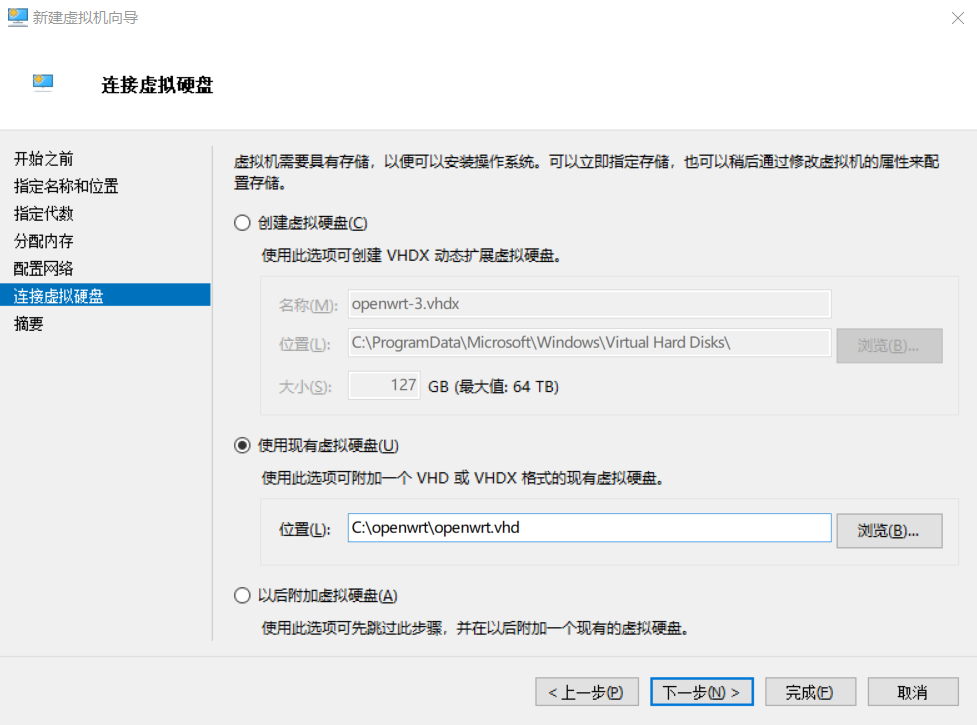
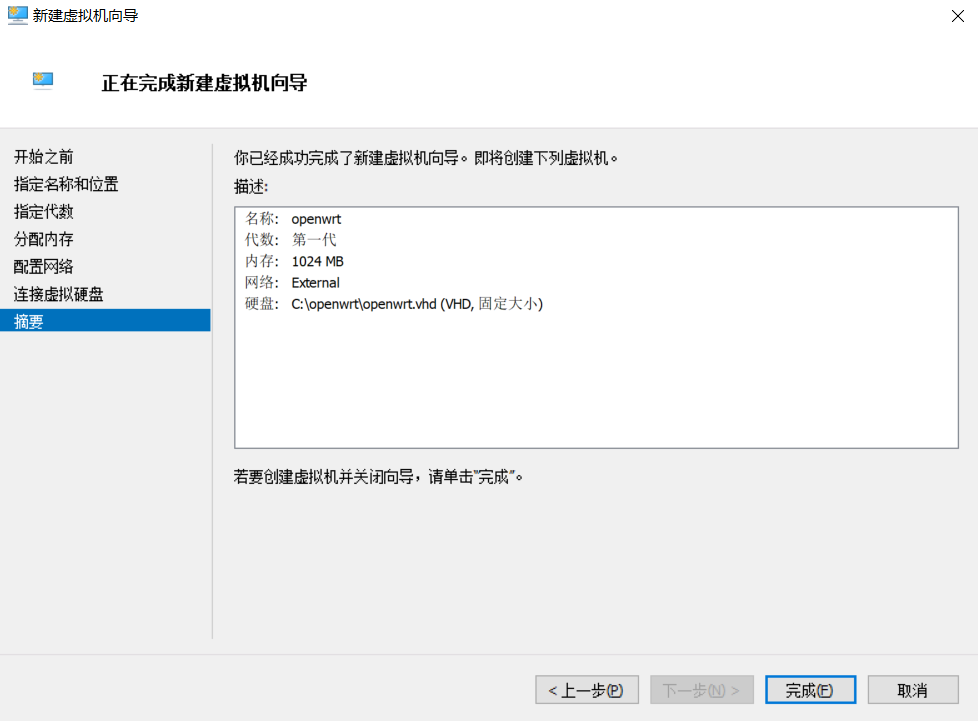
- 确认下配置,完成
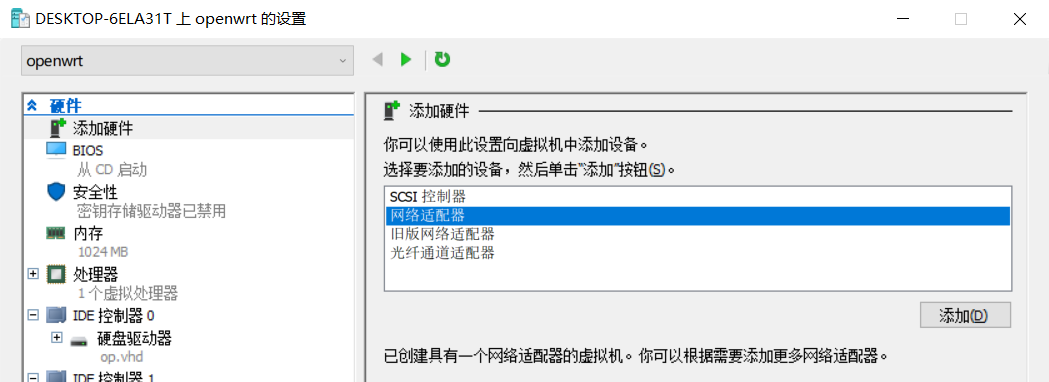
- 创建完后先不要运行,打开虚拟机的设置,添加 Internal 交换机
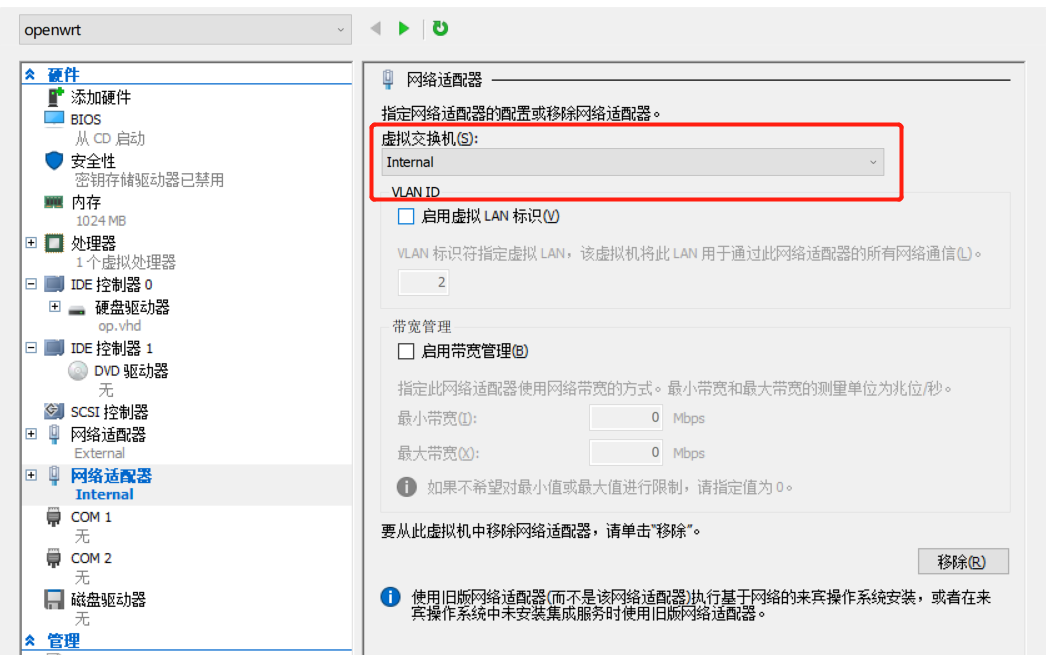
- 现在可以启动虚拟机,并用 hyper-v 连接了
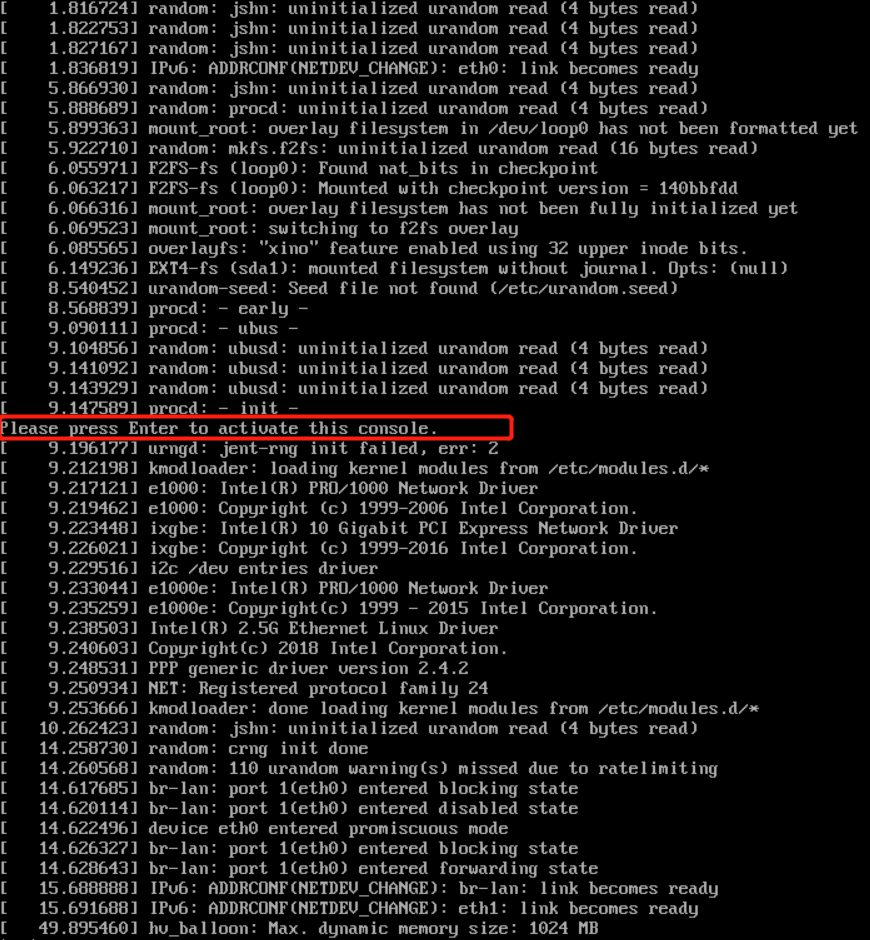
- 看到这个后可以按回车激活控制台
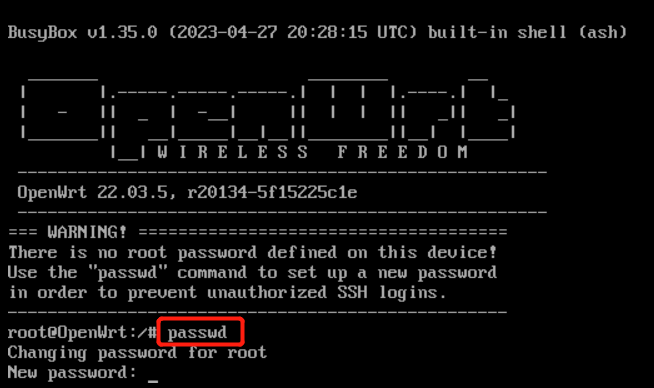
- 首先用 passwd 创建 root 密码
- 然后输入
vi /etc/config/network修改网络接口配置 - 刚才创建虚拟机时先选择了 External,创建后再添加的 Internal 交换机,所以这里的 eth0 对应外网 wan,eth1 对应内网 lan,有对应顺序。lan 的网段不要和现有网段重复,选个没用过的

- 保存退出后用
reboot重启虚拟机,之后就可以在浏览器里用192.168.5.1访问 openwrt 后台了(对应上面修改的网关地址)
OpenWrt LuCI
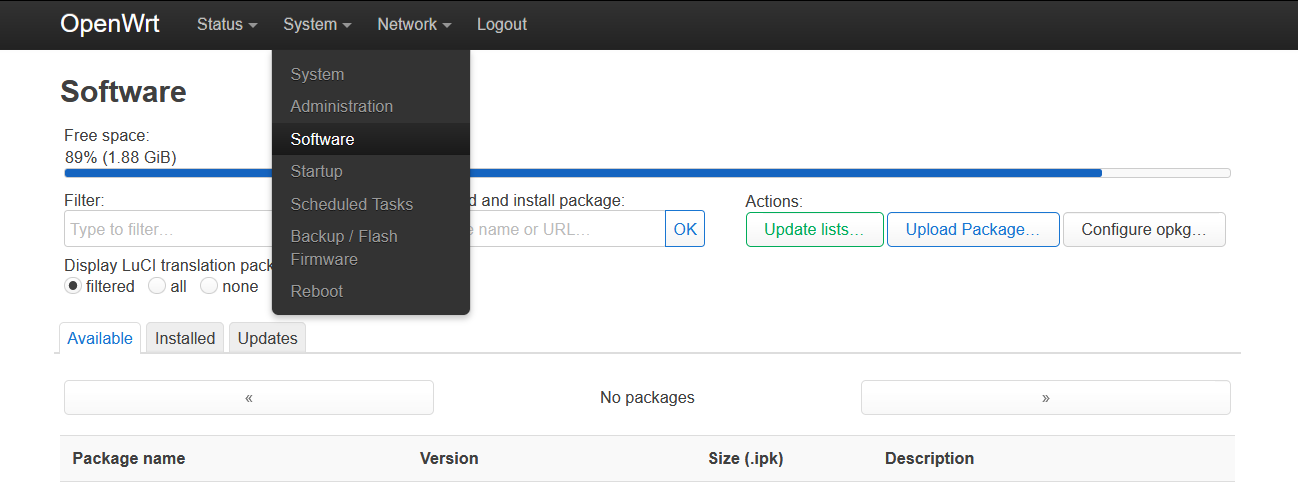
这里的操作用 opkg update 和 opkg install *** 在 ssh 控制台操作也是一样的。
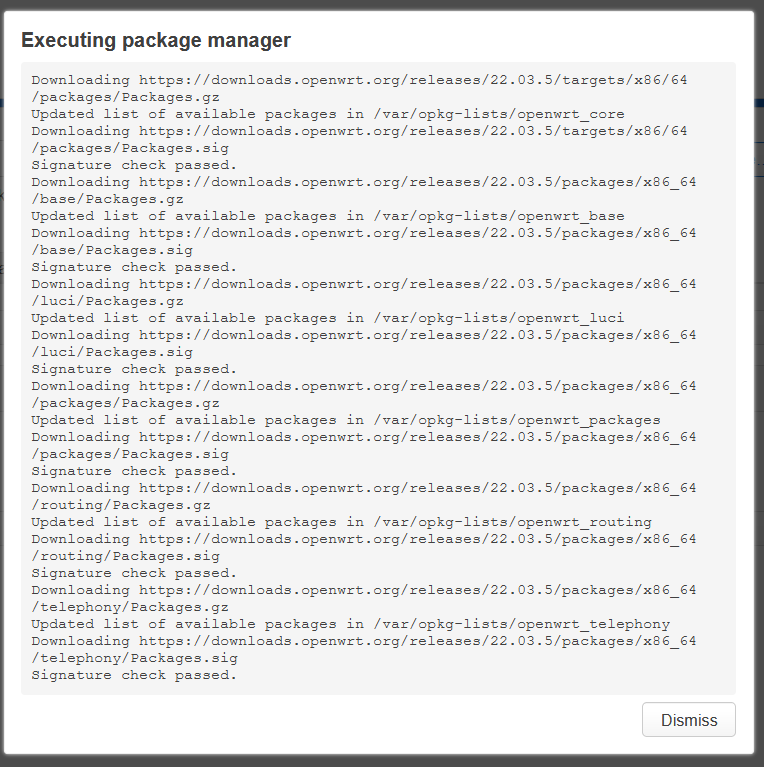
- 到 Software 菜单,点绿色的 Update lists,看到下面的弹窗说明操作成功了。如果有错误发生窗口里会有一栏显示相关的错误信息
- 分别在输入框输入
iptables-nft、iptables-mod-tproxy和iptables-mod-socket并安装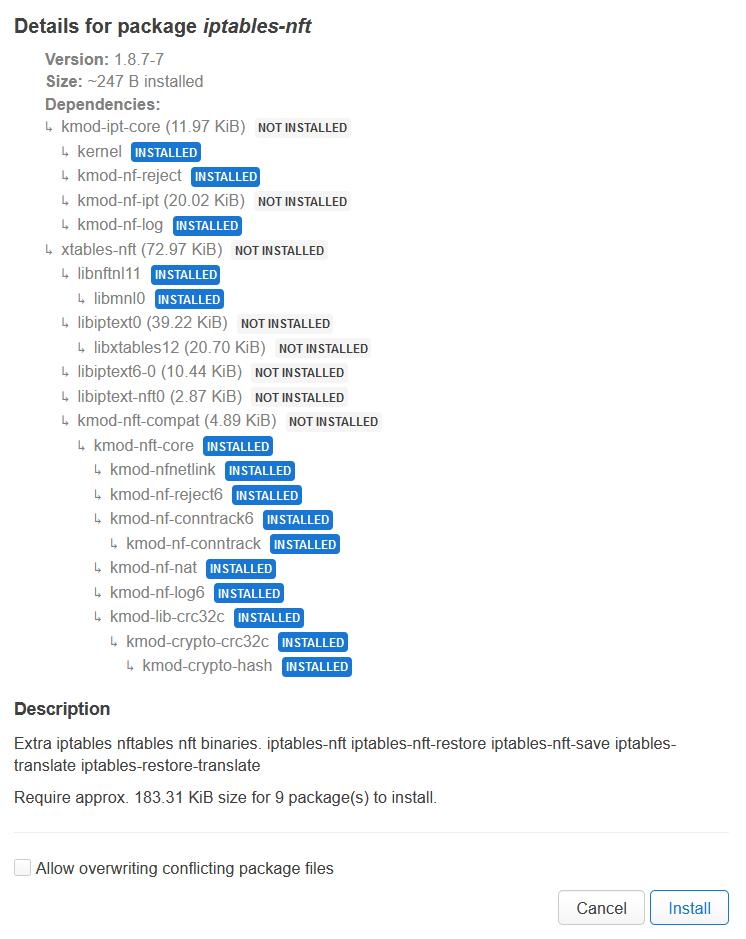
- 搜索
v2ray并安装前三个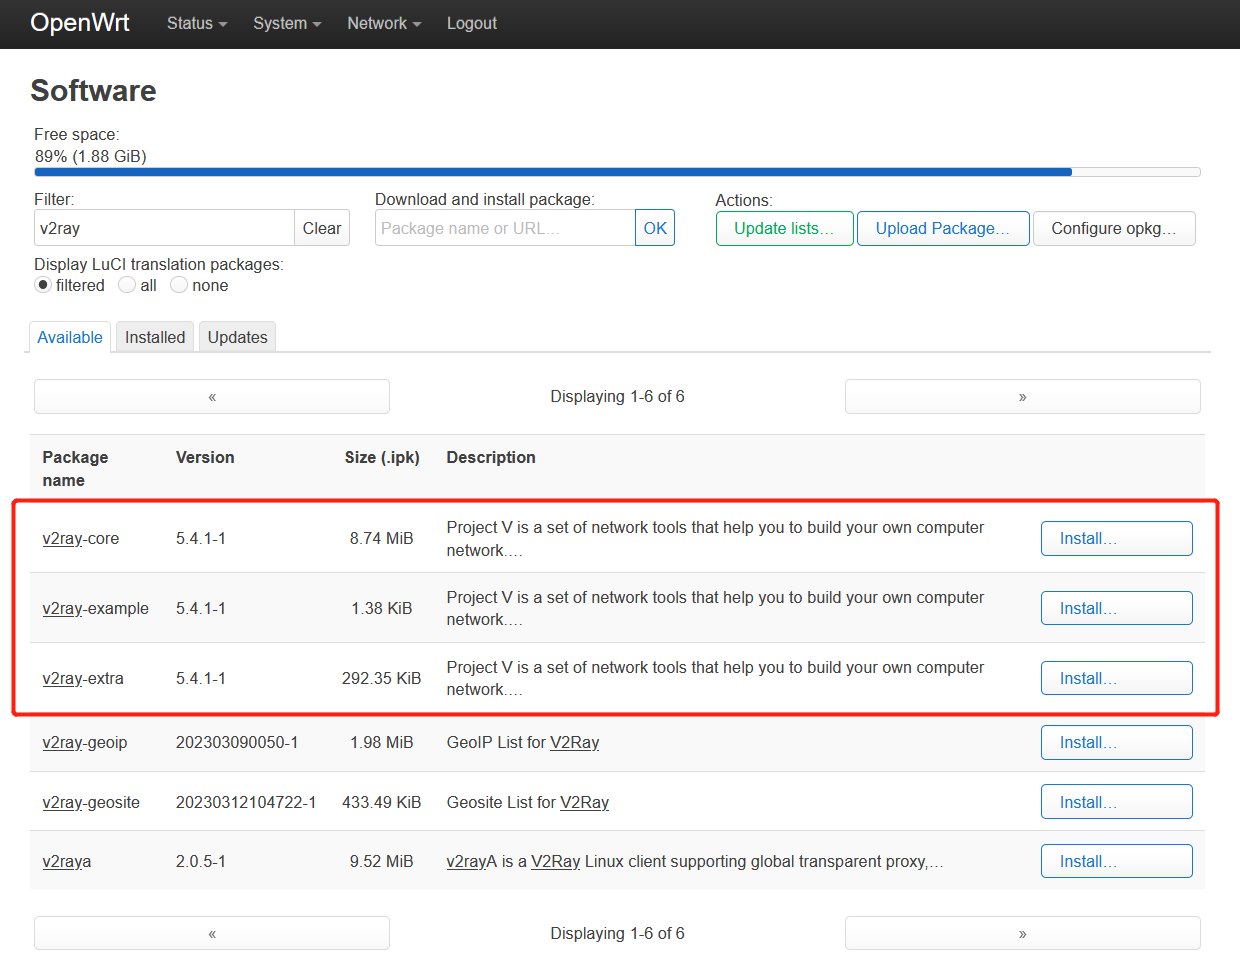
OpenWrt ssh
- 再用 ssh 登录 OpenWrt,将以下配置内容写入到
/etc/v2ray/config.json里,outbounds/proxy节里要替换上自己的服务器信息。广告拦截
部分有个别网站也会被拦截,所以注掉了。路由规则的最后再加上 proxy 的规则,表示所有剩余流量都发到代理上。{ "inbounds": [ { "tag":"transparent", "port": 12345, "protocol": "dokodemo-door", "settings": { "network": "tcp,udp", "followRedirect": true }, "sniffing": { "enabled": true, "destOverride": [ "http", "tls" ] }, "streamSettings": { "sockopt": { "tproxy": "tproxy", // 透明代理使用 TPROXY 方式 "mark":255 } } }, { "port": 1080, "protocol": "socks", // 入口协议为 SOCKS 5 "sniffing": { "enabled": true, "destOverride": ["http", "tls"] }, "settings": { "auth": "noauth" } } ], "outbounds": [ { "tag": "proxy", "protocol": "vmess", "settings": { "vnext": [ // 把你的服务器信息贴到这里 ] }, "streamSettings": { // 如果有 http 伪装之类的也抄过来 "sockopt": { "mark": 255 // 这些要保留 } }, "mux": { "enabled": true } }, { "tag": "direct", "protocol": "freedom", "settings": { "domainStrategy": "UseIP" }, "streamSettings": { "sockopt": { "mark": 255 } } }, { "tag": "block", "protocol": "blackhole", "settings": { "response": { "type": "http" } } }, { "tag": "dns-out", "protocol": "dns", "streamSettings": { "sockopt": { "mark": 255 } } } ], "dns": { "servers": [ { "address": "223.5.5.5", //中国大陆域名使用阿里的 DNS "port": 53, "domains": [ "geosite:cn", "ntp.org", // NTP 服务器 "$myserver.address" // 此处改为你 VPS 的域名 ] }, { "address": "114.114.114.114", //中国大陆域名使用 114 的 DNS (备用) "port": 53, "domains": [ "geosite:cn", "ntp.org", // NTP 服务器 "$myserver.address" // 此处改为你 VPS 的域名 ] }, { "address": "8.8.8.8", //非中国大陆域名使用 Google 的 DNS "port": 53, "domains": [ "geosite:geolocation-!cn" ] }, { "address": "1.1.1.1", //非中国大陆域名使用 Cloudflare 的 DNS "port": 53, "domains": [ "geosite:geolocation-!cn" ] } ] }, "routing": { "domainStrategy": "IPOnDemand", "rules": [ { // 劫持 53 端口 UDP 流量,使用 V2Ray 的 DNS "type": "field", "inboundTag": [ "transparent" ], "port": 53, "network": "udp", "outboundTag": "dns-out" }, { // 直连 123 端口 UDP 流量(NTP 协议) "type": "field", "inboundTag": [ "transparent" ], "port": 123, "network": "udp", "outboundTag": "direct" }, { // 直连中国大陆主流网站 ip 和 保留 ip "type": "field", "ip": [ "geoip:private", "geoip:cn" ], "outboundTag": "direct" }, { // 直连中国大陆主流网站域名 "type": "field", "domain": [ "geosite:cn" ], "outboundTag": "direct" }, { "type": "field", "ip": [ // 设置 DNS 配置中的国内 DNS 服务器地址直连,以达到 DNS 分流目的 "223.5.5.5", "114.114.114.114" ], "outboundTag": "direct" }, { "type": "field", "ip": [ // 设置 DNS 配置中的国外 DNS 服务器地址走代理,以达到 DNS 分流目的 "8.8.8.8", "1.1.1.1" ], "outboundTag": "proxy" // 改为你自己代理的出站 tag }, //{ // 广告拦截 // "type": "field", // "domain": [ // "geosite:category-ads-all" // ], // "outboundTag": "block" //}, { // BT 流量直连 "type": "field", "protocol":["bittorrent"], "outboundTag": "direct" }, { "type": "field", "outboundTag": "proxy", "network": "udp,tcp" } ] } } - geoip.dat 和 geosite.dat 可以到这里和这里下载,下载后可以放
/usr/bin目录,自动更新可以自行处理下 - 执行
v2ray test -c /etc/v2ray/config.json确保配置文件正确 - 执行
v2ray run -c /etc/v2ray/config.json启动 v2ray - 另起一个 ssh 执行
curl -so /dev/null -w "%{http_code}" google.com -x socks5://127.0.0.1:1080(按上面的配置就是用 1080 端口)应该可以看到输出301
;或者把浏览器的代理地址改成192.168.5.1:1080就可以科学上网(网关地址改成自己设置的)
透明代理
- 接下最后一步设置成透明代理
# 设置策略路由
ip rule add fwmark 1 table 100
ip route add local 0.0.0.0/0 dev lo table 100

# 代理局域网设备
iptables -t mangle -N V2RAY
iptables -t mangle -A V2RAY -d 127.0.0.1/32 -j RETURN
iptables -t mangle -A V2RAY -d 224.0.0.0/4 -j RETURN
iptables -t mangle -A V2RAY -d 255.255.255.255/32 -j RETURN
iptables -t mangle -A V2RAY -d 192.168.0.0/16 -p tcp -j RETURN # 直连局域网,避免 V2Ray 无法启动时无法连网关的 SSH,如果你配置的是其他网段(如 10.x.x.x 等),则修改成自己的
iptables -t mangle -A V2RAY -d 192.168.0.0/16 -p udp ! --dport 53 -j RETURN # 直连局域网,53 端口除外(因为要使用 V2Ray 的 DNS)
iptables -t mangle -A V2RAY -j RETURN -m mark --mark 0xff    # 直连 SO_MARK 为 0xff 的流量(0xff 是 16 进制数,数值上等同与上面V2Ray 配置的 255),此规则目的是解决v2ray占用大量CPU(https://github.com/v2ray/v2ray-core/issues/2621)
iptables -t mangle -A V2RAY -p udp -j TPROXY --on-ip 127.0.0.1 --on-port 12345 --tproxy-mark 1 # 给 UDP 打标记 1,转发至 12345 端口
iptables -t mangle -A V2RAY -p tcp -j TPROXY --on-ip 127.0.0.1 --on-port 12345 --tproxy-mark 1 # 给 TCP 打标记 1,转发至 12345 端口
iptables -t mangle -A PREROUTING -j V2RAY # 应用规则

# 代理网关本机
iptables -t mangle -N V2RAY_MASK
iptables -t mangle -A V2RAY_MASK -d 224.0.0.0/4 -j RETURN
iptables -t mangle -A V2RAY_MASK -d 255.255.255.255/32 -j RETURN
iptables -t mangle -A V2RAY_MASK -d 192.168.0.0/16 -p tcp -j RETURN # 直连局域网
iptables -t mangle -A V2RAY_MASK -d 192.168.0.0/16 -p udp ! --dport 53 -j RETURN # 直连局域网,53 端口除外(因为要使用 V2Ray 的 DNS)
iptables -t mangle -A V2RAY_MASK -j RETURN -m mark --mark 0xff    # 直连 SO_MARK 为 0xff 的流量(0xff 是 16 进制数,数值上等同与上面V2Ray 配置的 255),此规则目的是避免代理本机(网关)流量出现回环问题
iptables -t mangle -A V2RAY_MASK -p udp -j MARK --set-mark 1   # 给 UDP 打标记,重路由
iptables -t mangle -A V2RAY_MASK -p tcp -j MARK --set-mark 1   # 给 TCP 打标记,重路由
iptables -t mangle -A OUTPUT -j V2RAY_MASK # 应用规则

# 新建 DIVERT 规则,避免已有连接的包二次通过 TPROXY,理论上有一定的性能提升
iptables -t mangle -N DIVERT
iptables -t mangle -A DIVERT -j MARK --set-mark 1
iptables -t mangle -A DIVERT -j ACCEPT
iptables -t mangle -I PREROUTING -p tcp -m socket -j DIVERT
- 逐个执行完上面的这些命令后透明代理应该已经生效,关掉其他代理软件也可以直接上网了
开机自动运行透明代理
- 首先保存现有的 iptables 规则到文件
mkdir -p /etc/iptables && iptables-save > /etc/iptables/rules.v4 - 用
vi /root/run-proxy新建一个脚本(前三条是清除透明代理规则,后三条是重建)/sbin/ip rule del fwmark 1 table 100 /sbin/ip route del local 0.0.0.0/0 dev lo table 100 /usr/sbin/iptables -t mangle -F /sbin/ip rule add fwmark 1 table 100 /sbin/ip route add local 0.0.0.0/0 dev lo table 100 /usr/sbin/iptables-restore /etc/iptables/rules.v4
- 到 LuCI 的
System - Startup - Local Startup页面,在exit 0之前插入一行/bin/sh /root/run-proxy,这样开机后就会自动配置代理规则 - 打开
/etc/config/v2ray,把option enabled '0'的 0 改成 1,使 v2ray 开机自启,配合上一条就完成启动配置了(不过这几天试用下来在 PC 睡眠恢复后常有部分网站代理不了的情况出现,比如 google 打不开但 youtube 能打开,或者反过来,再继续找找原因看)
